Wednesday
Painting a mural to bring the outside in.
I had a blank wall in my foyer that just didn’t work. A mural helped. I painted this a number of years ago.


One stroke painting, Tole Tray
Monday
One of a kind freestanding hutch.
This was the top of a small hutch. There was no shelf. I got a 12x1 inch piece of wood and cut it to size. Adding the brackets below to complete the finished look. I also added molding around the shelf for a detailed finished look. I was unable to get both stains to match so I did a green paint wash on the shelf’s edge and the edges of the back splash, with decorative one stroke flower arrangement painting in the center.


Wednesday
A shabby Chest transformed into a wonderful decorative piece of furniture.
This was an antique chest with no drawers. I could not find matching drawers so I decided to make doors. I measured and cut the doors out of a ¾ inch oak. I then painted 1x1 strips of wood black, cut to size and screwed to the door giving them a finished edge.
To make the inside more functional I added a slide out drawer using kitchen drawer brackets and 3/4 inch oak piece of wood. The back is a piece of ¾ inch oak. I measured the width of the chest and cut the oak wood to fit nicely in back. I then used a Jig saw and cut the curves on top. I added molding around the edges to give it a finished look and it also makes the wood look very thick. To add more stability and a decorative look I added the side brackets. I connected them to the back piece and the chest. I measured out all the shelving and the wooden beams that I cut from a wooden crib. I painted the beams and the shelving black before attaching them to the back. I attached the back with 1x1 strips of wood going from the top all the way down to the bottom of the legs. Before attaching the shelves, I stained everything to make sure it all matched in color. The ending result.


To make the inside more functional I added a slide out drawer using kitchen drawer brackets and 3/4 inch oak piece of wood. The back is a piece of ¾ inch oak. I measured the width of the chest and cut the oak wood to fit nicely in back. I then used a Jig saw and cut the curves on top. I added molding around the edges to give it a finished look and it also makes the wood look very thick. To add more stability and a decorative look I added the side brackets. I connected them to the back piece and the chest. I measured out all the shelving and the wooden beams that I cut from a wooden crib. I painted the beams and the shelving black before attaching them to the back. I attached the back with 1x1 strips of wood going from the top all the way down to the bottom of the legs. Before attaching the shelves, I stained everything to make sure it all matched in color. The ending result.


Saturday
Coming back to life, fresh and pretty
Wednesday
Serving tray fit for a lady
Sunday
Pretty and pink
Friday
Nice showcase for pictures.
This is an old house window made out of wood. I wanted to prepare this window for a fresh new coat of paint. I started by scraping and sanding all to old flaky and chipped paint off. When I started to sand it, it reviled all these wonderful colors. It was the history of that window and how many times it has been painted over the past seventy-five years. I decided not to paint it, but to leave it showing all the history.
I then got some etching paint. I taped down a stencil to the class and applied the etching paint as directed on the jar. When I removed the paint and the stencil I had this great etching. I printed out some great summer photos and applied them to the glass I didn't etch.
This is defiantly a one of a kind window.

.JPG)
I then got some etching paint. I taped down a stencil to the class and applied the etching paint as directed on the jar. When I removed the paint and the stencil I had this great etching. I printed out some great summer photos and applied them to the glass I didn't etch.
This is defiantly a one of a kind window.

.JPG)
Tuesday
Home Sweet Home
 I drew these teapots out of a 1-inch piece of play wood. I took my jigsaw and cut the teapot out. I then drilled two holes on each side for the flower handle. I sanded, primed and painted with heirloom white paint. For the final touch I added a appliqués, Home Sweet Home wording and painted a green boarder.
Sunday
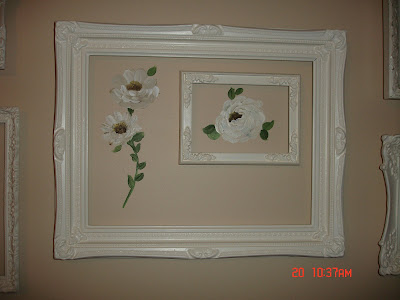
If it's standing still, watch out! I will paint anything that is not moving.
When I found this wonderful collection of frames, they were all different colors. I primed and painted them. I liked the Idea of having a collection of different size frames arranged on the wall. I decided to add my signature and paint the wall behind with flowers. Cost $7.00
Tuesday
Some of my Favorite Things

Subscribe to:
Posts (Atom)


